What is a good refurbished medical equipment? How do you check a medical equipment is truly refurbished well following established processes? The goal of a refurbishment process is to help the customer by producing equipment that is as close to the original as possible. Here are process steps and best practices followed by good refurbishers and OEMs.
1. Equipment selection
Selecting the right machine is the very first step in good refurbishment practices. Not all equipment are suitable for refurbishment. Generally equipment in mid-life which has been handled gently and maintained well are preferred. Therefore, knowing the service history of the equipment is essential. Upgrade-ability is another important factor. It is also important to check if the technical configuration is the one in demand and or can be easily updated to a saleable one within reasonable cost. Last but not the least; the equipment must be in active phase of life-cycle so as to ensure spare-parts availability. In other words, if the manufacturer has declared the model end-of-life, the equipment support may be difficult as spare parts may no longer be available in a few years.
Considering all the above factors, once equipment has been selected for refurbishment the following steps are performed:
2. Cleaning & Disinfection
Used medical equipment can sometimes become contaminated by its use in a clinical environment. Where the equipment has been used in a special environment (e.g. emergency or operating room) it might be necessary to disinfect first before disassembly, so that even people inspecting & dis-assembling the equipment are protected from infection. This step also ensures others involved in the refurbishment process are also protected from risk of infection. A good refurbishment centre will ensure cleaning and disinfection as part of the established refurbishing process, ensure dedicated tools and agents needed for cleaning and disinfection are all available.
3. Disassembly, packing & shipment
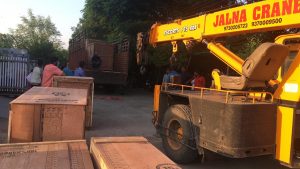
The system may be in good condition at customer site, but may get damaged during transportation even before refurbishment. To ensure this does not happen, all major systems and components are professionally de-installed, dis-assembled, packed and transported safely to refurbishment centre without any damage.
4. Inspection, fault diagnostics & Testing
Once at the refurbishment centre, a thorough inspection, fault diagnostics & testing is done of all visible parts, mechanical, electrical components, transducers and electronic hardware & software performance. After reviewing error logs, extended basic tests are executed.
5. Planning for Refurbished Medical Equipment
How the refurbishment proceeds after inspection & testing can differ greatly based on the components that need replacement and systems that need further testing etc. Hence a proper planning and resource deployment needs to be done for each equipment. The final configuration of the refurbished system must be within the scope of the original product registration from the manufacturer when the system was originally produced and put on the market for the first time. The people planning the necessary refurbishment actions must be skilled to ensure that the required actions do not represent a modification that might impair the original identity and approved configuration. Due to the criticality of the refurbishment planning process, the organization that performs refurbishment must have reliable controls for this process step and have it defined in detail in its quality management system.
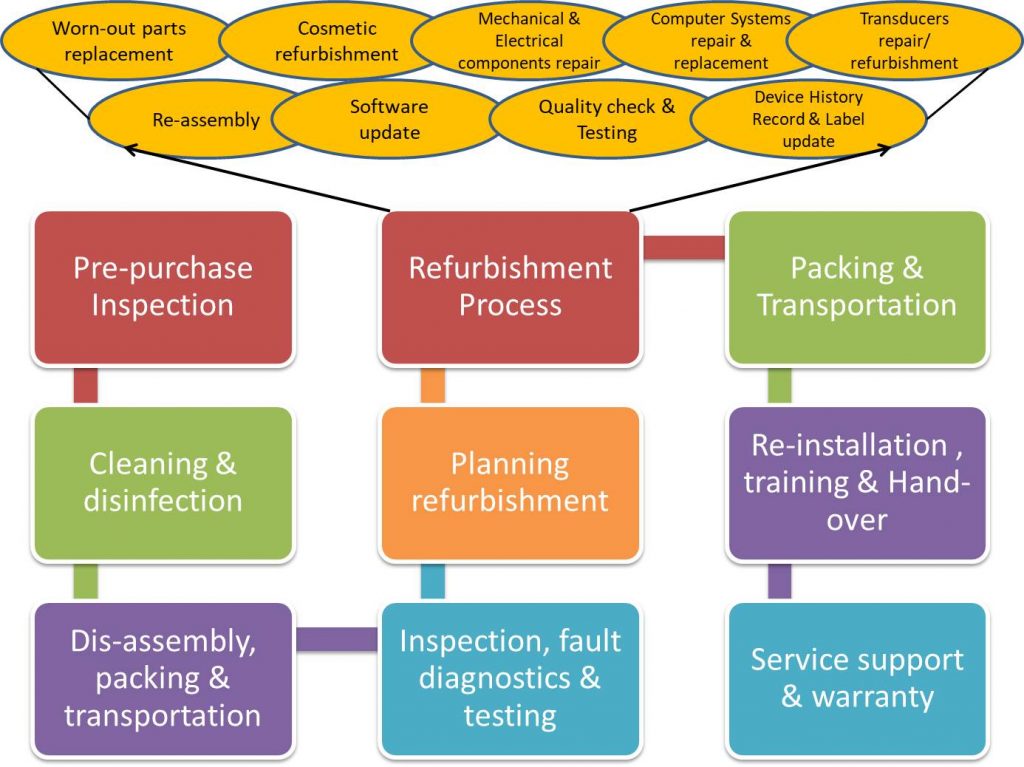
6. Refurbishment Process
Refurbishment process itself involves the following activities:
-
- Replacing worn-out parts
- Cosmetic refurbishment – Surface treatment, painting & others – Systems are professionally cleaned inside and out, sanded, and any imperfections are repaired; System shells are then sterilized and repainted.
- Mechanical component repair – Defective and out-dated parts are replaced with new or remanufactured parts that are guaranteed to meet OEM specifications
- Electrical component repair
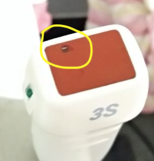
- Transducer repair – If it is an ultrasound machine being refurbished, a transducer is one of the most important part of the machine. Each ultrasound transducer is inspected for cracks, swelling, bubbles and crystal damage. Connectors and cables are checked for tear, damage or breaks. Read more about common defects in ultrasound probes that can be repaired if detected in time.
- Computer systems repair/ replacement – All ultrasound accessories, such as VCRs, printers, filters and keyboards, are thoroughly inspected and enhanced to meet OEM standards
- Re-assembly of the system
- Software updates with optional hardware upgrade
- Thorough system, sub-system, component level quality testing and re-calibration -The machines are tested and calibrated, including a complete electrical safety check before a final check of error logs. All errors are cleared and the filter service meters are reset. Once the refurbishing process is completed, every system is pre-staged and functionally tested in each unit before dispatch.
- Update Device History Record – Throughout the refurbishing process, the Device History Record (DHR) is continuously updated in a good refurbishment centre.
- Adding updated labels – after a final pre-shipment inspection and certification, new labels are affixed.
7. Packing & Transportation of Refurbished medical equipment
It is not enough to refurbish the system well at the centre. The system must reach its new user as good as new. Hence, it is critical that the post-refurbishment activities such as packing and shipment must be identical or equivalent to the process steps for new systems.
This includes
- following OEM instructions for packing,
- employing specified tools needed for packing,
- use of OEM specified packing material e.g. frames,
- follow OEM instructions for transportation and tools for monitoring transportation, e.g. shock and temperature indicators etc.
…so that the equipment reaches customer site in as good a condition as it was after refurbishment.
8. Re-installation of Refurbished Medical Equipment
Once at the customer site the equipment must be as carefully handled as it was new. Due processes must be followed for re-installation, system performance check, training & handover at client site just the same as for a new one.
Visit the refurbishment centre to check out how well trained their people are, what tools & facilities they possess for the various quality checks, testing and other processes and most importantly how stringently do they follow prescribed processes.
After Sales Service & Warranty
A user may not always be able to judge the efficacy of refurbishment process. However, a refurbisher who possesses the right knowledge, skills and does a good professional job, should be confident of extending standard warranties and service support as required for a refurbished medical equipment.
Most OEMs offer 1 –year warranty for refurbished systems and promise of original spare parts availability for a minimum of 5 years.
PrimedeQ is an eMarketplace for medical equipment. We offer all types of used & refurbished medical equipment including imaging equipment. Contact us for X-Ray, C-arm, CT, Cathlab, MRI, ultrasound machines, OT and ICU equipment. We also assist in ultrasound machine repair and probe repair & maintenance services at www.Primedeq.com. Contact us at +918971223957 or +917019759765 for all your medical equipment related needs.
https://in.linkedin.com/in/shanthi-mathur-ab07838